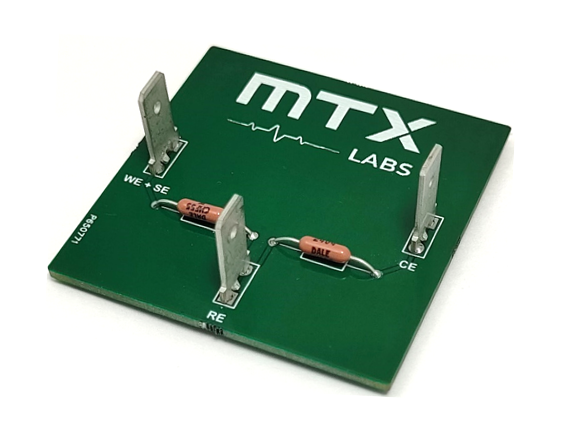
This application note provides comprehensive guidance on using the mini Dummy Cell for MedPstat calibration. The mini Dummy Cell includes a 1K ohm resistor, essential for checking the current ranges during calibration. The primary focus of this document is to check the MedPstat functionality & accuracy with the help of the Linear Sweep Voltammetry (LSV) technique.
Introduction:
A “dummy cell” serves as a testing apparatus to ensure the proper functioning of a potentiostat. It’s employed to qualitatively assess instrument performance & accuracy, serving as a calibration tool for experimental methods. This mini Dummy Cell includes a 1K ohm resistor, enabling the potentiostat to measure current accurately.
Principle:
During the dummy cell test, Ohm’s Law (V = IR) is used to analyze the slope of the Current (I) versus Potential (V) graph. This helps to check if the measured resistance matches the expected value. The accuracy of the measured current depends on the precision of the resistor.
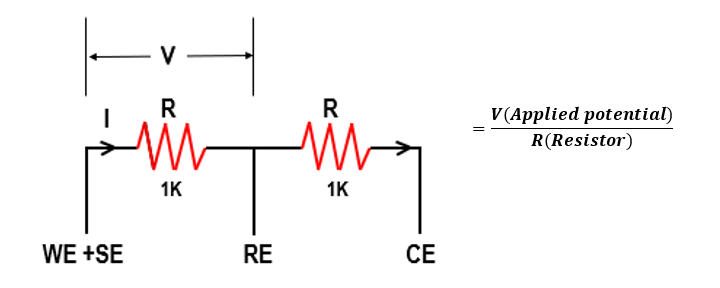
Experimental Apparatus:
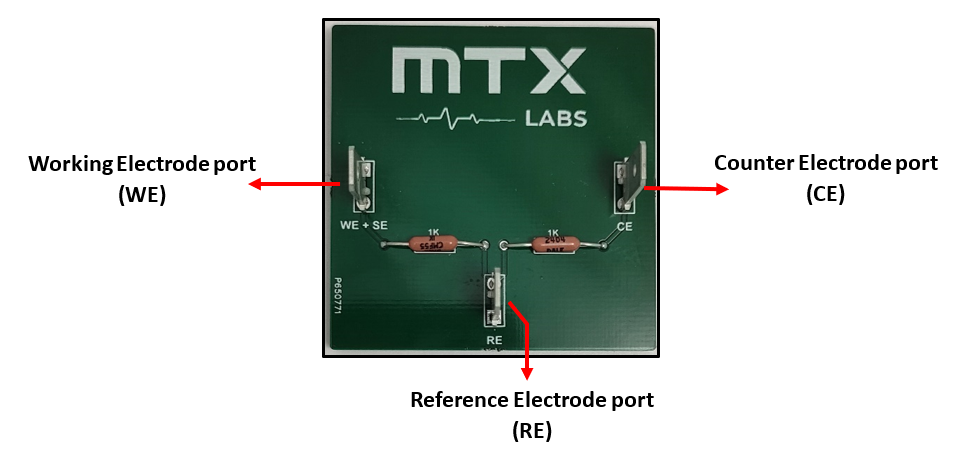
In our experiment, we utilized the MTX Labs Mini Dummy Cell with the MedPstat potentiostat. This dummy cell includes a built-in 1kΩ resistor, designed to effectively test the potentiostat’s functionality. The device is compact and user-friendly, featuring three clearly labeled terminal connectors for the working, counter, and reference electrodes (as shown in the figure below).
To perform the experiment, we used crocodile clips to attach the electrodes to the corresponding terminal ports, ensuring secure and proper connections. The straightforward labeling and compact design of the Mini Dummy Cell made it an excellent tool for efficiently conducting our potentiostat tests.

Procedure:
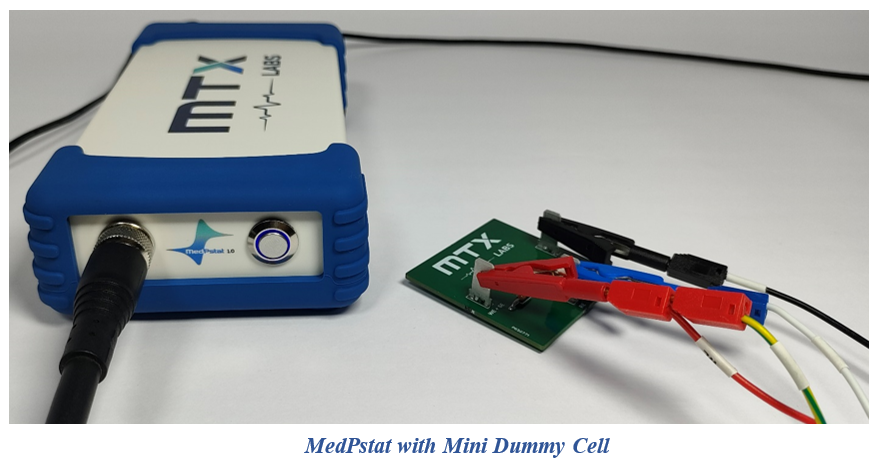
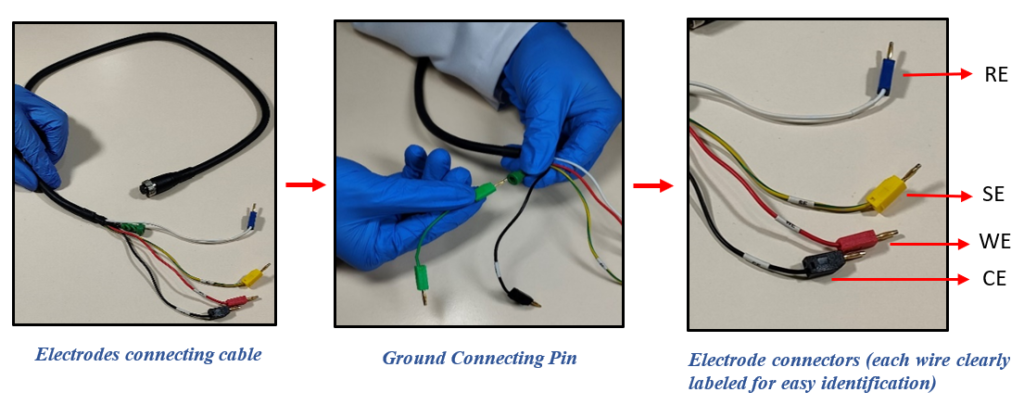
- To connect the dummy cell to the MedPStat, Attach the crocodile clips to the corresponding wires of the MedPStat cable, ensuring each clip is connected to the matching terminal. If you need additional help, refer to the above figure. Next, install the MedEPlot software using the USB pen drive provided in the instrument box.
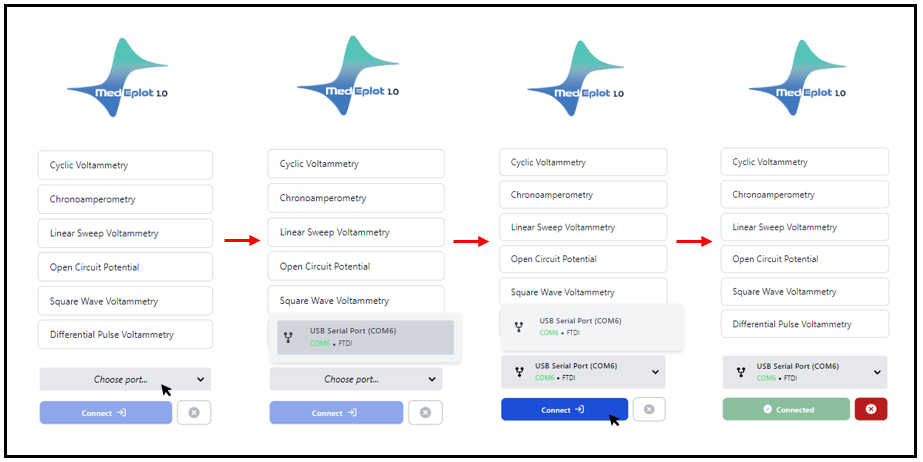
- Open the “MedEplot” software on Windows. The software is user-friendly, with a simple indicator: Grey means no connection, Blue signals readiness, and Green means you’re good to go.
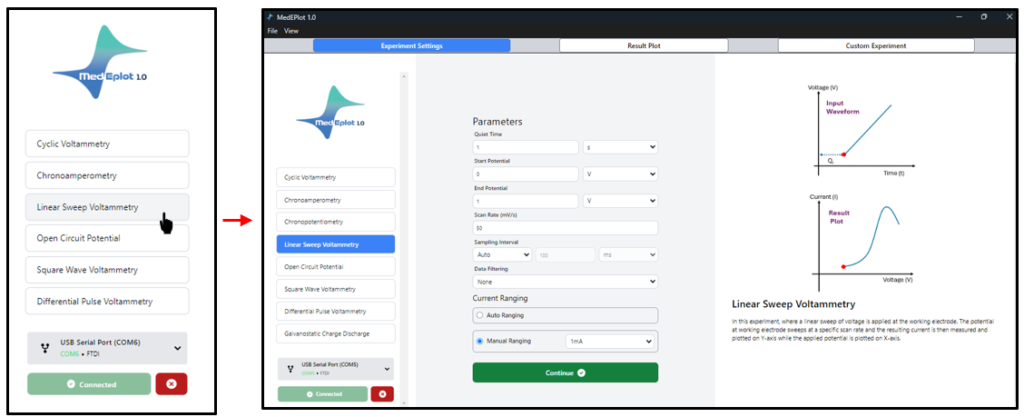
- Press the Linear Sweep Voltammetry (LSV) technique. Upon choosing LSV, the window divides into two sections. On one side, you’ve got the General Parameters box next to the experiment techniques, and on the other, you’ll find the fundamentals of LSV.
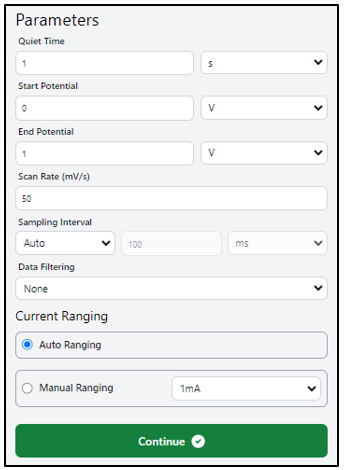
- Before proceeding, let’s verify our setup to ensure all connections are correctly aligned. Click “Continue” to commence the experiment. Once initiated, a new window will appear. Begin the experiment by selecting “Start Experiment.”
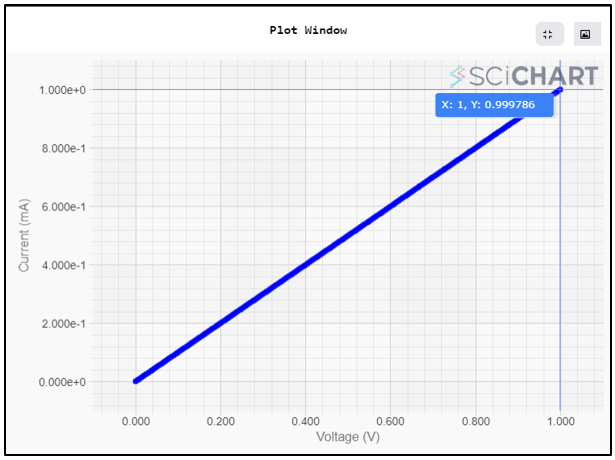
5. The plot will appear on the screen as it is produced. and it’ll adjust itself automatically when done.
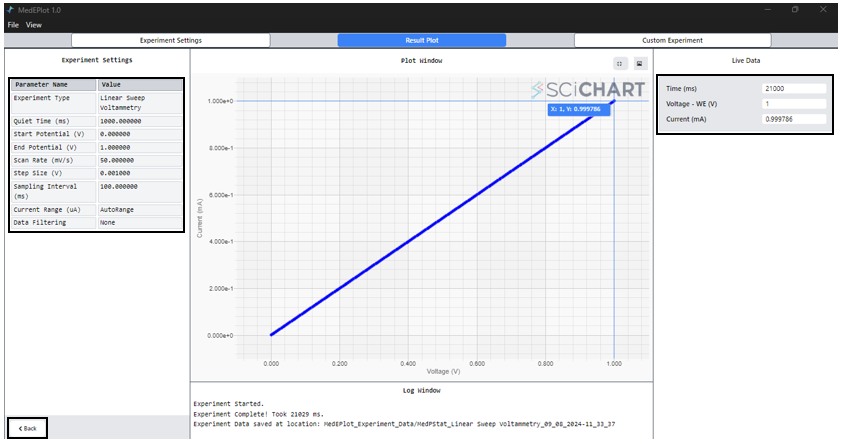
6. In the plot window, access experimental settings on the LEFT, observe real-time data on the RIGHT, and find the completion status at the bottom. To return to the main window or initiate another experiment, simply press the ‘BACK’ button.
Conclusion:
The linear sweep voltammetry (LSV) experiment using a dummy cell was conducted with a potential range of 0V to 1V at a scan rate of 50 mV/s. The final measured current was 0.999786 mA at an applied Potential of 1 V, confirming a high level of accuracy. The resulting graph displayed a straight line, confirming that the voltage control and response of the instrument are functioning correctly without any deviations. Therefore, the LSV instrument is verified to be operating within an acceptable range, indicating that it is ready for dependable use in future studies.
Thanks for Choosing MTX Labs as your research companion.
MTX Labs Team

