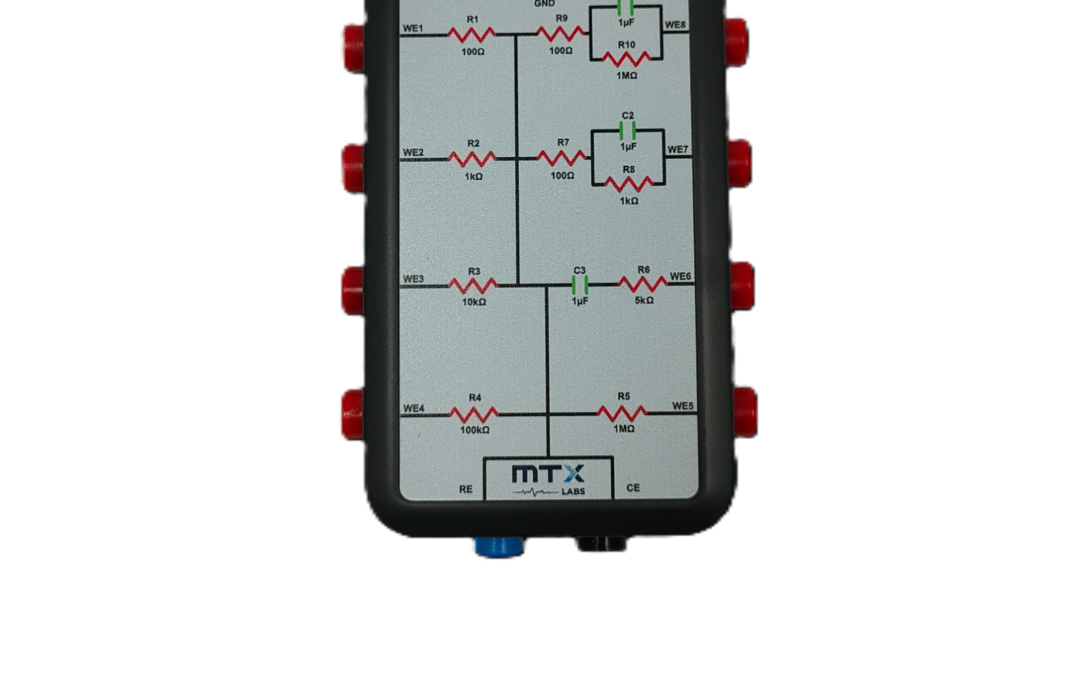
Welcome to this comprehensive application note, crafted to offer detailed guidance on utilizing the Dummy cell for potentiostat calibration, specifically focusing on the Linear Sweep Voltammetry (LSV) technique. This document aims to equip you with the necessary instructions for precise calibration. Our primary focus is on calibrating the potentiostat with respect to distinct current ranges. This user-friendly guide will walk you through each step, empowering you to achieve reliable and consistent results in your electrochemical experiments. Welcome to the world of precise electrochemical calibration!
Introduction:
A “dummy cell” serves as a testing apparatus to ensure the proper functioning of a potentiostat. It’s employed to qualitatively assess instrument performance & accuracy, serving as a calibration tool for experimental methods necessitating multiple perturbations and data averaging, particularly in time-sensitive sampling scenarios.
Principle:
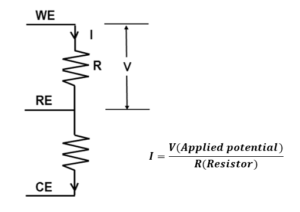
During the dummy cell test, a Linear Sweep Voltammetry technique is utilized to administer a voltage sweep across a resistor of known value. This resistor is connected externally to the potentiostat and linked via the cell cable. By applying Ohm’s Law (V = I R), the slope of the Current (I) versus Potential (V) graph is analyzed to validate the measured resistance, in ohms, against the expected value. The accuracy of the measured current depends upon the accuracy of the resistor, so it is always recommended to use an accurate resistor with low tolerance.
Experimental Apparatus:
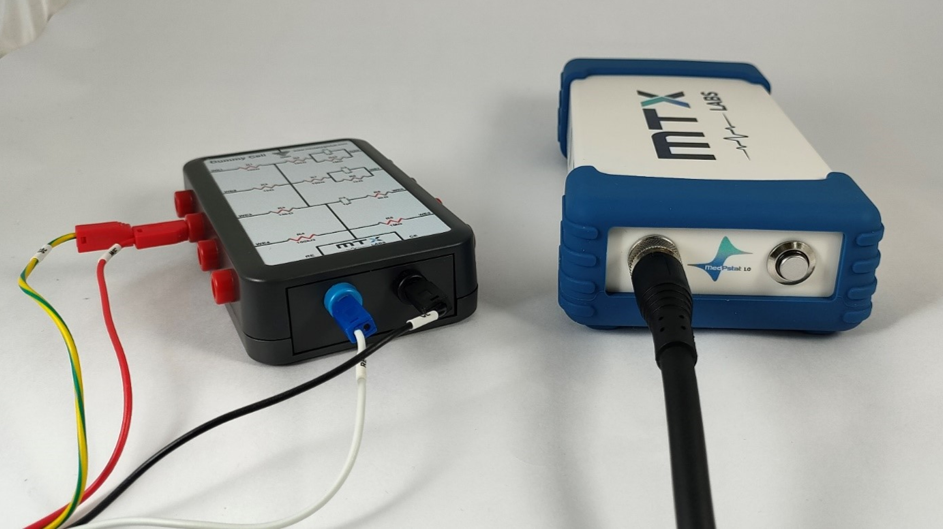
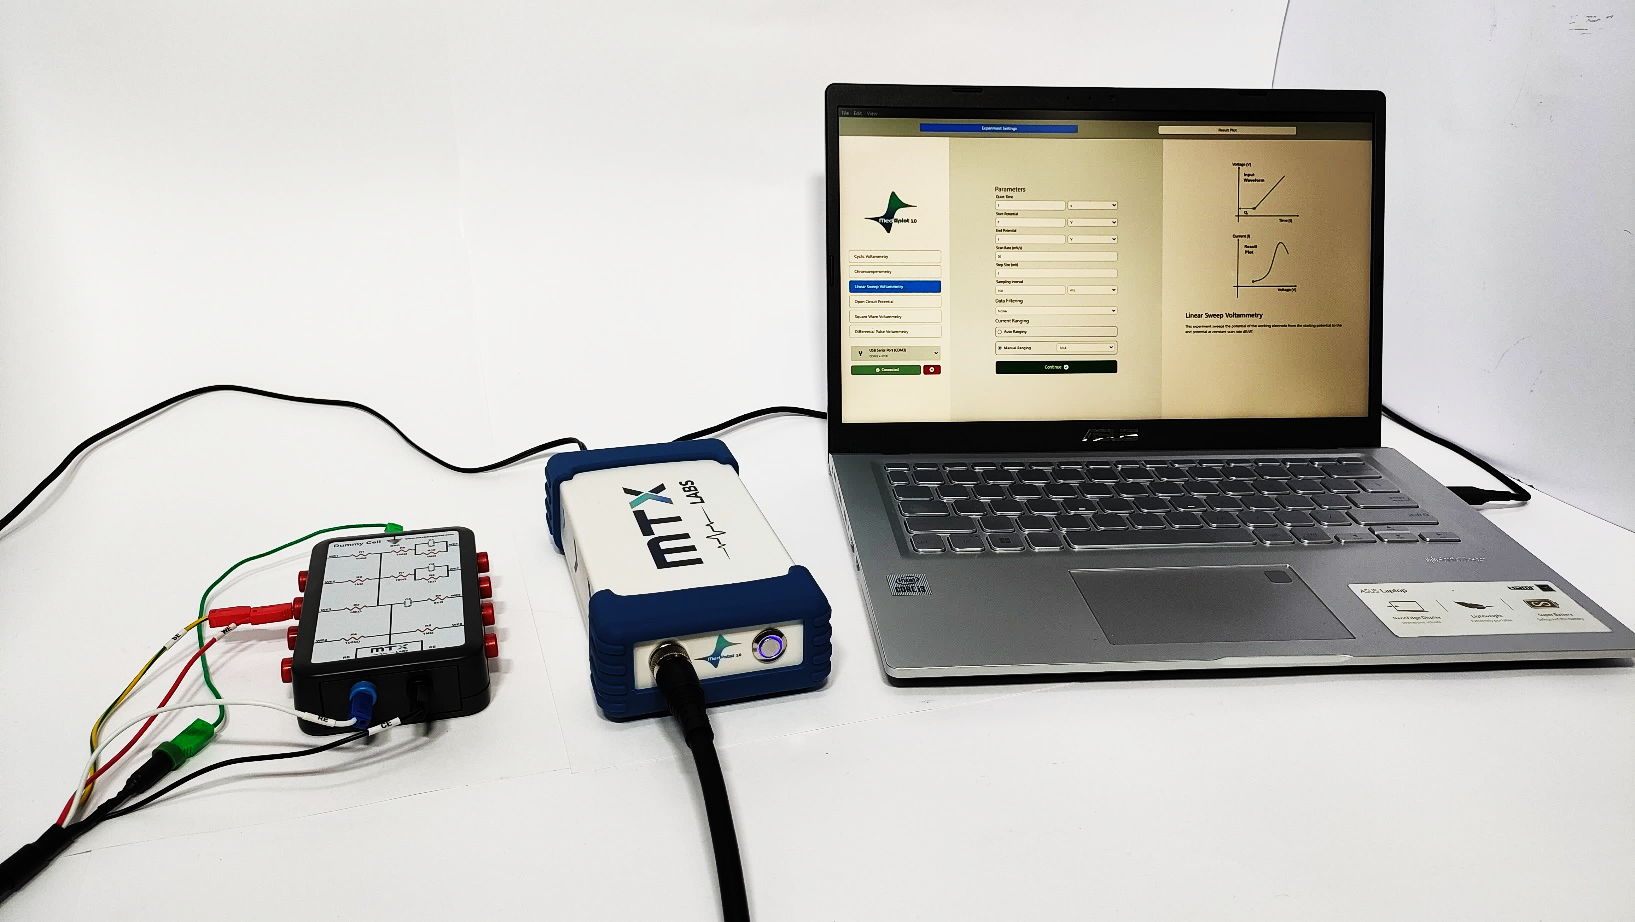
In our experiment, we teamed up the MTX Labs Dummy Cell with the MedPstat (Potentiostat). This dummy cell is designed with user convenience in mind. It features 8 working electrode ports, clearly marked in red from WE1 to WE8. Specifically, WE7 and WE8 are earmarked for impedance studies. The blue ports serve as reference electrodes, while the black ports are designated for counter electrodes, and the green ports for ground connections. Each port is equipped with a 2mm hole, ensuring easy and secure connections.

Procedure:
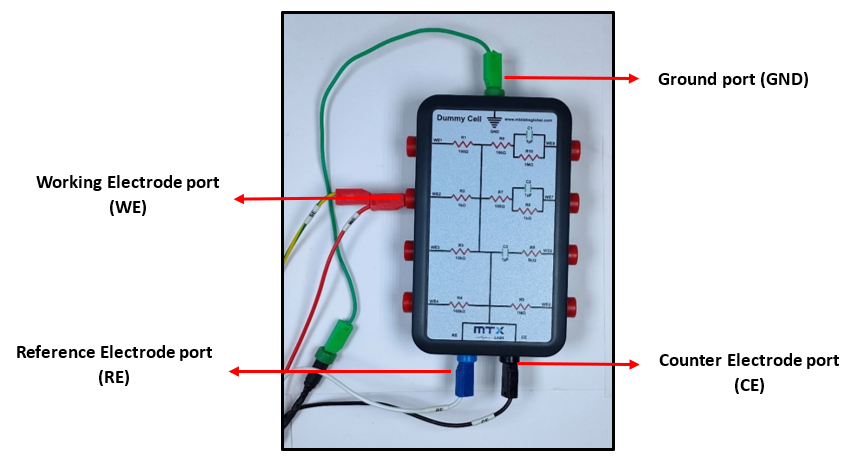
- To connect the dummy cell to the MedPStat, follow the instructions provided earlier or refer to the image above for visual guidance.
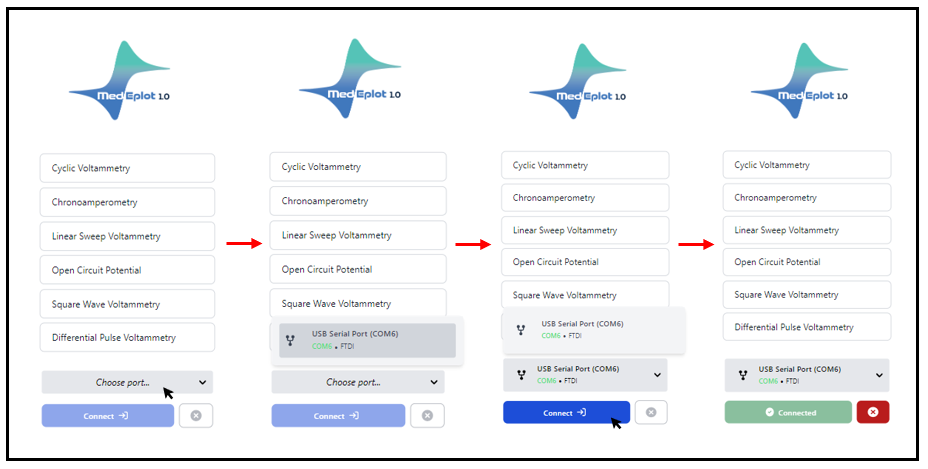
2. Open the “MedEplot” software on Windows. The software is user-friendly, with a simple indicator: Grey means no connection, Blue signals readiness, and Green means you’re good to go.
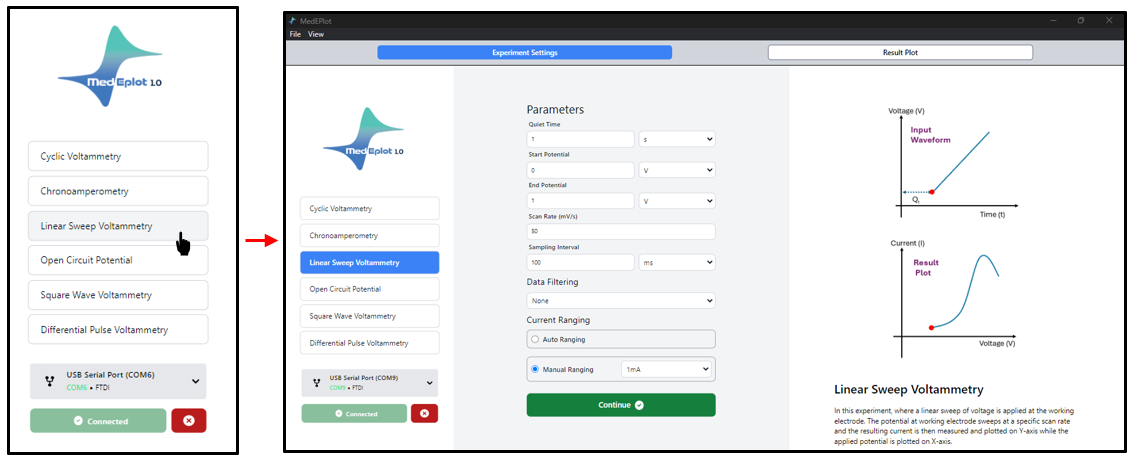
3. Press the Linear Sweep Voltammetry (LSV) technique. Upon choosing LSV, the window divides into two sections. On one side, you’ve got the General Parameters box next to the experiment techniques, and on the other, you’ll find the fundamentals of LSV.
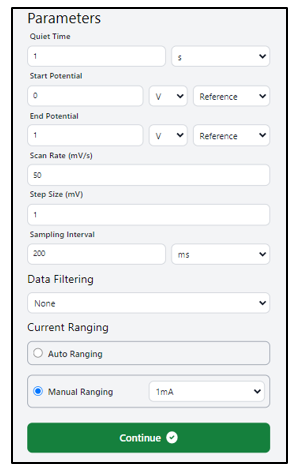
4. Before we proceed, let’s confirm our setup. We’re connecting the working electrode to port 2, as shown in the previous figure. The resistance (R2) value is set at 1KΩ. According to Ohm’s law, this indicates that the current range should be 1mA. Please select the current range as 1mA from the dialogue box.
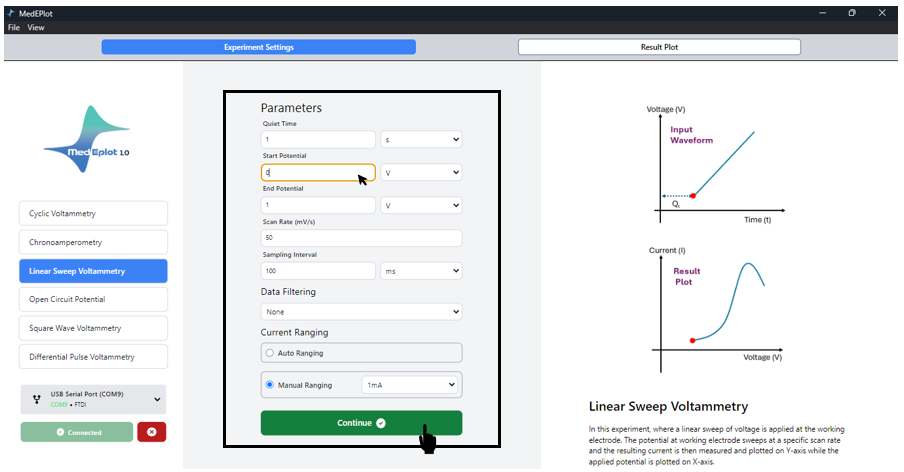
5. Simply click on the dialogue box to modify the values as needed. Follow the suggested settings or feel free to customize them, as demonstrated in the figure below. Press “Continue” to kick off the experiment. Once you do, a new window will pop up.
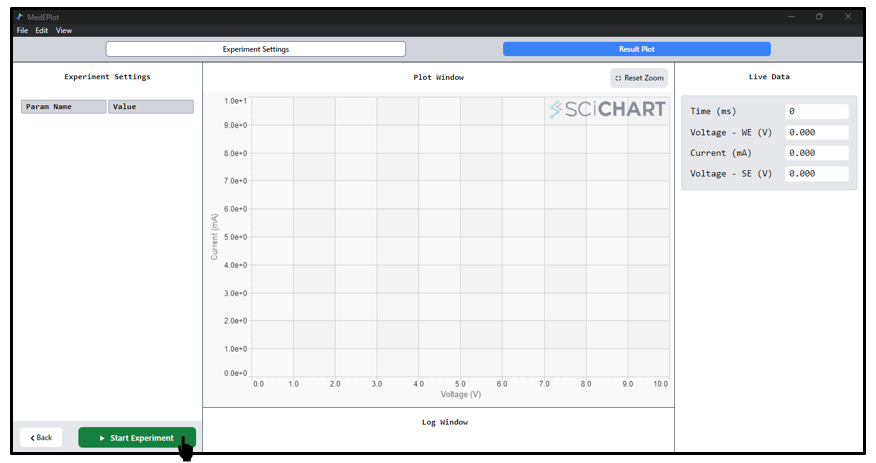
6. Initiate the experiment by clicking on “Start Experiment.”
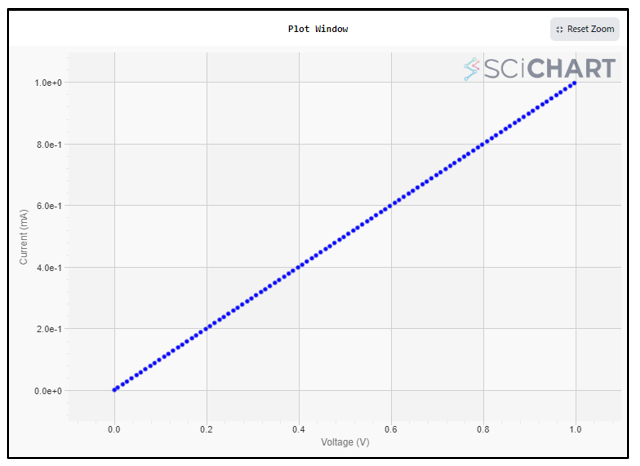
7. The plot will appear on the screen as it is produced. and it’ll adjust itself automatically when done. Here are the LSV results for 1KΩ. (Note: We’ve selected the Working Electrode port 2 (WE 2) for the experiment).
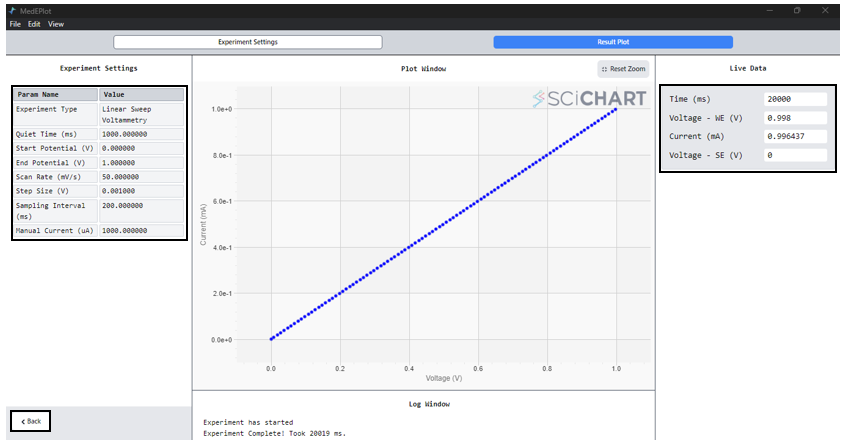
8. In the plot window, access experimental settings on the LEFT, observe real-time data on the RIGHT, and find the completion status at the bottom. To return to the main window or initiate another experiment, simply press the ‘BACK’ button.
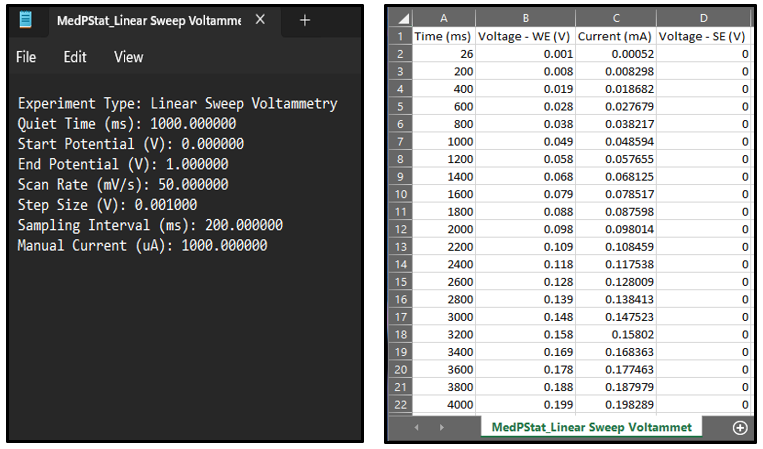
9. Once the experiment is completed, navigate to the MedEplot_Experiment_Data folder in Documents. Within this folder, you will encounter two sets of files: one comprising the experimental data file (.txt), and the other consisting of the Excel sheet data file (.csv).
Conclusion:
In conclusion, the linear sweep voltammetry (LSV) calibration experiment using a dummy cell was conducted with a potential window ranging from 0V to 1V and a scan rate of 50 mV/s. The live data recorded a final measured current 0.996437 mA at applied Potential 0.998 V, demonstrating a high level of accuracy. The resulting graph displayed a straight line, confirming that the voltage control and response of the instrument are functioning correctly without any deviations. Therefore, the LSV instrument is verified to be operating within an acceptable range, indicating that it is ready for dependable use in future studies.

